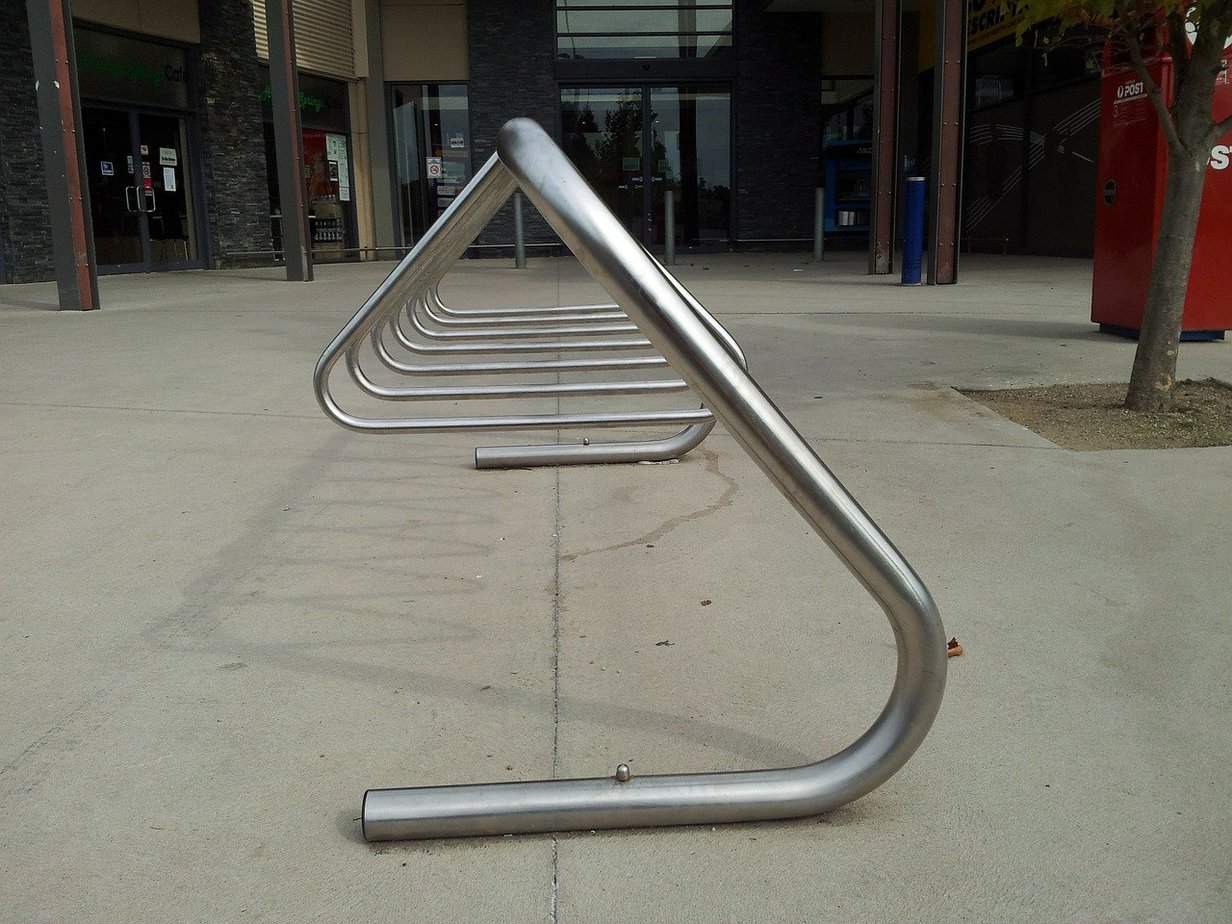
Bicycle stand is an inseparable element of public space. They can be found in many places: at the entrance to a store, near a church, in front of a block of flats… Who says it can’t also be found in your garden? If you are a cycling enthusiast and you often go on bicycle trips together with your family, choose the right place for it on your property. See how you can make it yourself.
Bicycle leaning against the facade of the house can damage it. A poorly supported bike often falls over with a bang. Sometimes it causes unsightly chips in the paint, which disfigure the vehicle. You can prevent this in a very simple way. All you have to do is roll up your sleeves and take some time to create an elegant bike stand.
First, think about how many vehicles the rack should hold. It’s better to make a few more compartments to allow your guests to park their unicycles safely. If your kids love riding scooters, make room for them. Go for simple and functional solutions. Make sure the bike stand is easy to use. Also plan a place for helmets. This will make it easier to keep things tidy.
A wooden bike stand will look grand in your garden. The natural material is easy to work with and environmentally friendly. Below you will find a list of essential things you need to prepare before you start DIY.
List of tools and materials:
When you manage to gather all the necessary things, you can start working. Also, make sure to wear comfortable clothes that will allow you to move freely. This way you will have a lot of fun doing the project on your own.
If you have created an outline of your stand and have gathered your tools and materials, you can get started. Our tips will help you get started quickly.
Step 1
Cut the slats to the desired length. Short pieces should be cut at a 45-degree angle on both sides. This will make them easier to install and create a stable structure. Use the longer pieces to make the frame and the base of the support. Remember to sand all the slats. A smooth surface is pleasant to the touch. You will also get rid of splinters, which can make life miserable. This is especially important if you have toddlers living in your home.
Step 2
Screw the longer slats together. When the frame and base are ready, make the dividers.
Step 3
Waterproof the wood. This will prevent the stand from being damaged by varying weather conditions. A water-resistant coating will protect it from water. In addition, it will not dry out if exposed to excessive sunlight. This way you will prolong its life.
If you care about an original look of the support, you can paint it in any color you like. This will change the arrangement of your garden and emphasize its unique character.
Step 4
Fix the hooks in the space for helmets and other bike accessories.
Bravo! Your bike rack is now ready. Now fasten it to the ground. You’re ready to hit the trails.
If you love manual work, you can develop your hobby. DIY will help you relax and forget about everyday troubles. It will give you strength to meet the expectations of your boss and family members. Working in a workshop can be a lot of fun. It all depends on your attitude.
A self-made bike rack is something to be proud of. It stands out from the store floor and is perfectly suited to individual needs. It’s functional and simple. In addition, it brings a lot of joy. In a word, it is priceless!
A wooden bike rack is a practical solution. It can be made from boards lying around in the workshop. The cost of making the compartment is not high. It perfectly complements the decor of the property and allows you to keep it tidy. Implementation of the project does not take much time.